A garment shipment can look fine when you check a few pieces from the production line. The situation may be different when the cartons are opened before shipment.
One hoodie may have a loose thread. Another may have a measurement issue. A third piece may have a print that is slightly off-center. None of these problems are unusual during mass production. The important question is whether the number and severity of defects are within the buyer’s agreed quality standard.
This is where a proper garment QC process matters.
For apparel buyers, AQL inspection provides a practical way to inspect a production lot without checking every single garment. But AQL is only useful when the inspection standard, defect classification, measurements, and sampling method are agreed before production.
In this guide, I’ll explain how AQL inspection works for clothing and what we normally pay attention to when checking T-shirts, hoodies, and other apparel before shipment.

What Does AQL Mean in Garment Inspection?
AQL stands for Acceptable Quality Limit.
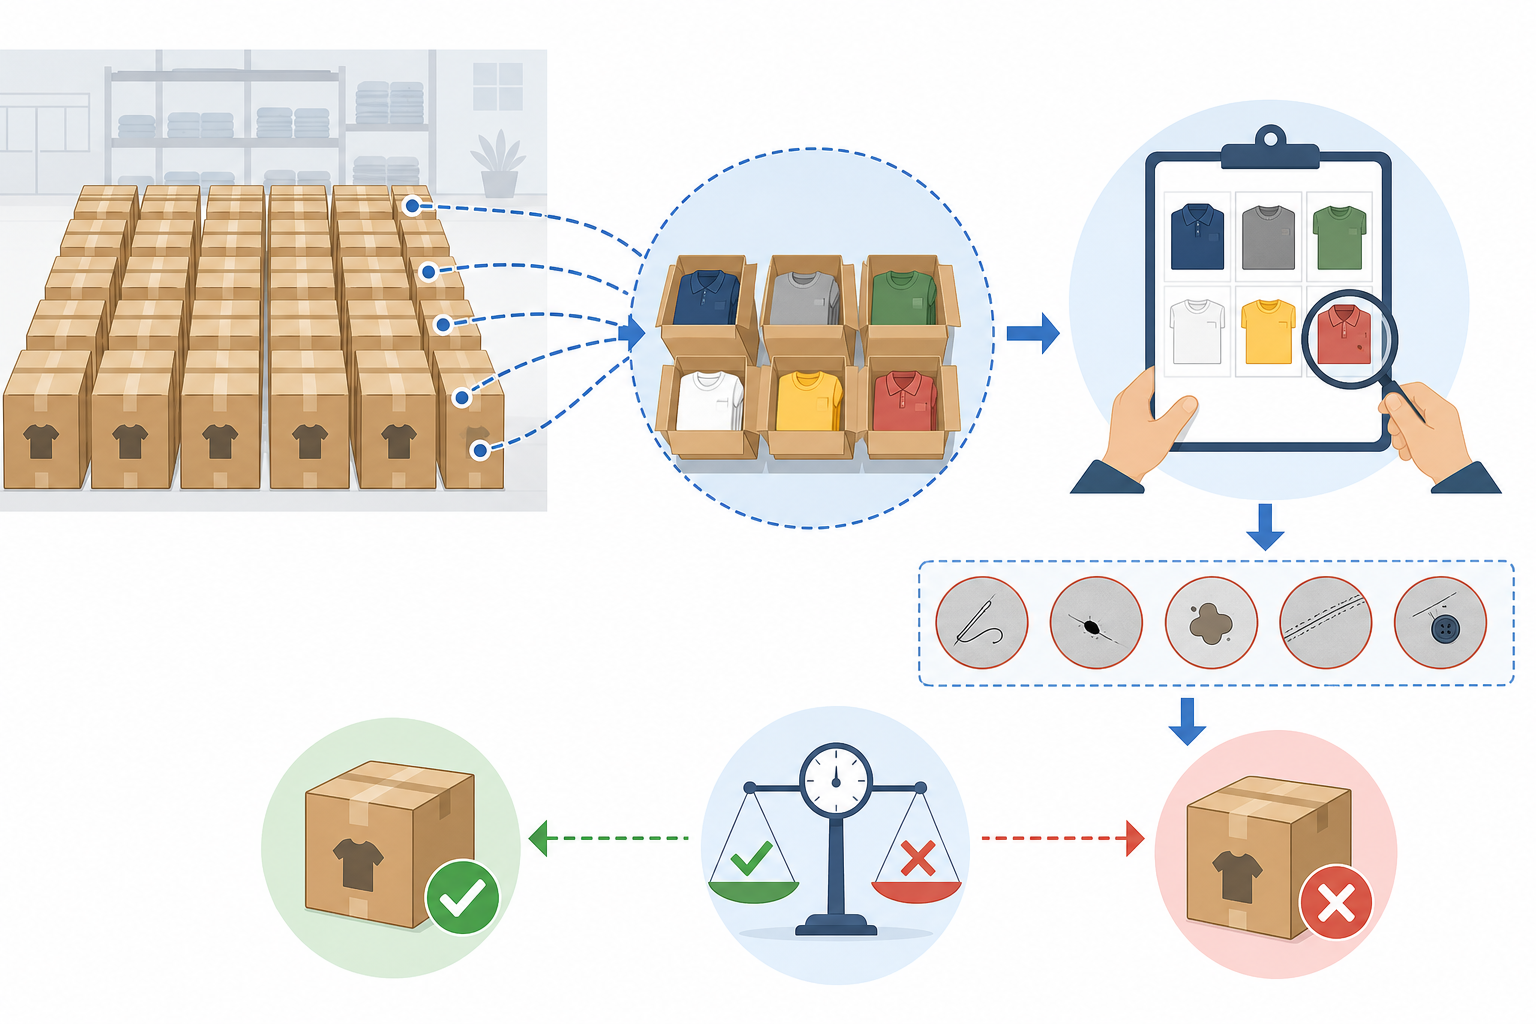
In apparel inspection, AQL is used as part of a statistical sampling system. Instead of inspecting every garment in a production lot, the inspector checks a selected number of pieces and compares the defects found with predetermined acceptance and rejection numbers.
There is an important point here:
AQL does not mean that a factory is allowed to produce a fixed percentage of defective garments.
It is a sampling method used to make an accept-or-reject decision about an inspected lot.
The inspection normally involves three elements:
- Lot size
- Sample size
- Defect acceptance criteria
The buyer should also define how defects are classified before the inspection takes place.
AQL 2.5 and AQL 4.0: What Do They Mean?
For apparel orders, buyers often use AQL 2.5 for major defects and AQL 4.0 for minor defects.
These are common requirements, but they are not universal rules.
A buyer may specify a different standard depending on the product, retailer requirements, or internal quality policy. If the purchase order or inspection specification says AQL 1.5, for example, that requirement should take priority.
The inspector needs to know the agreed AQL level before selecting the sample.
It’s also important to understand that the AQL number does not directly tell you how many defective garments are allowed in every order. The acceptance number depends on the lot size and sample size selected from the relevant sampling table.
How Does AQL Inspection Work?
Let’s use a simple example.
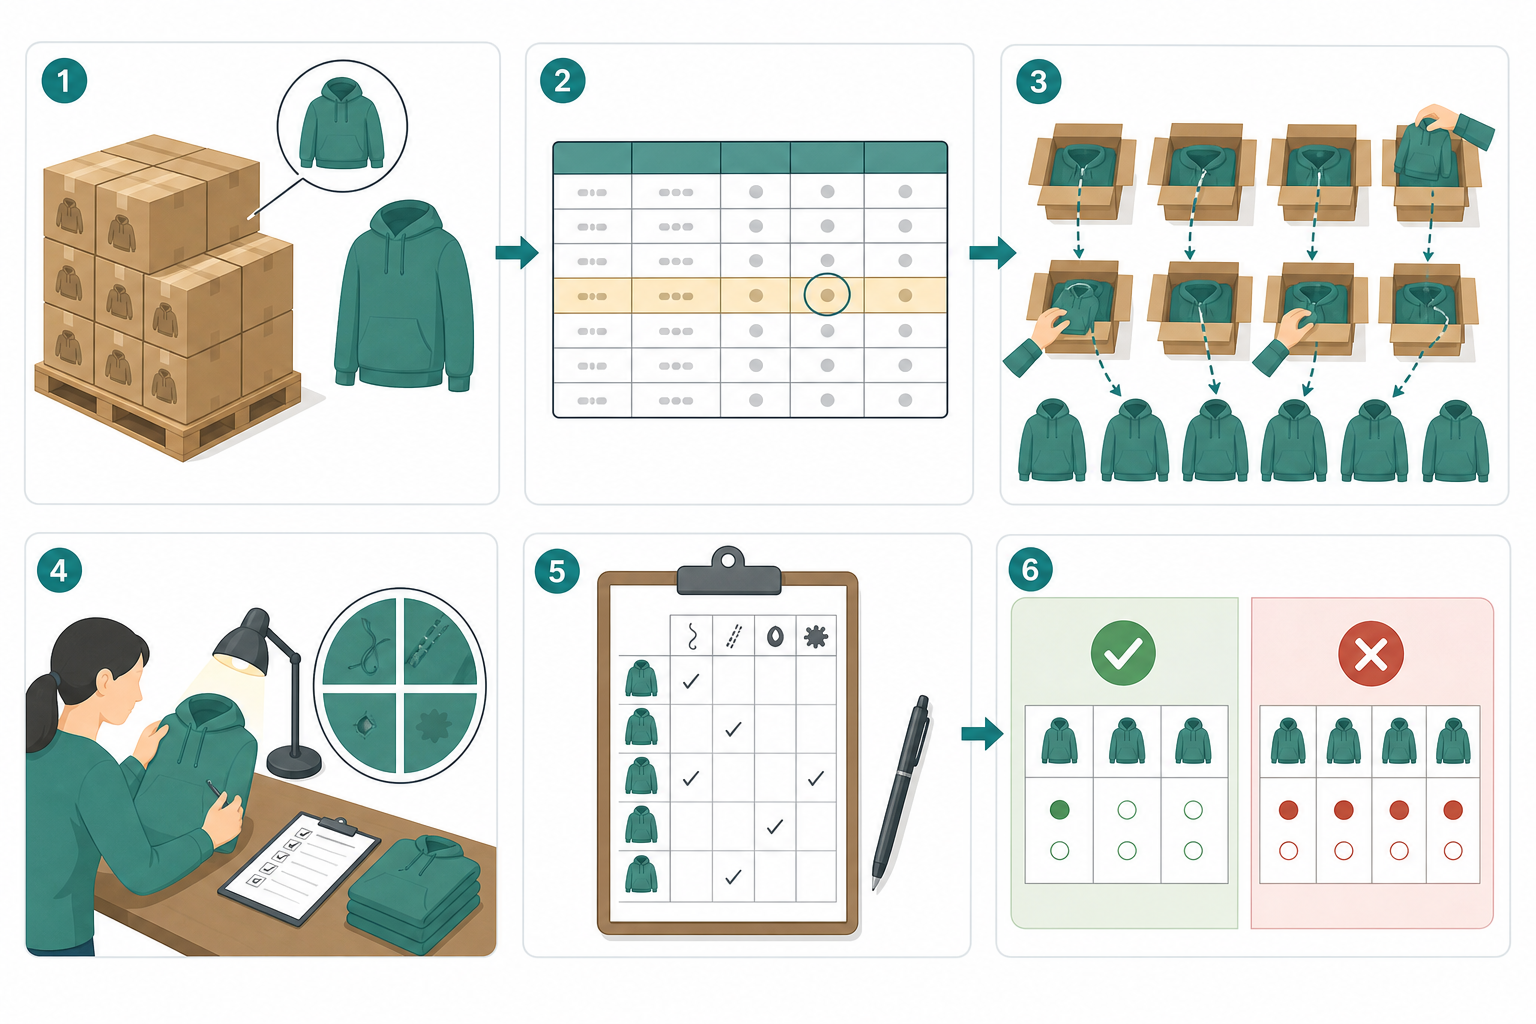
Imagine a buyer has ordered 3,000 hoodies.
The inspector first identifies the production lot and then determines the required sample size using the agreed inspection level and sampling standard.
For a typical inspection using General Inspection Level II, the applicable sampling table is used to determine the sample code and sample quantity.
The inspector then selects garments randomly from the production lot.
This part is important.
If all samples come from one carton at the top of the warehouse stack, the inspection may not represent the whole shipment. A better approach is to take samples from different cartons and, where appropriate, different colors and sizes.
Once the samples are selected, each garment is checked against the approved specifications.
The inspector records the defects and separates them into the agreed categories.
At the end, the number of defects is compared with the applicable Ac (Acceptance) and Re (Rejection) numbers.
If the result meets the agreed criteria, the lot can be accepted under that inspection standard. If it exceeds the rejection number, the lot fails the inspection.
What Should a Garment QC Inspection Cover?
A good inspection is not simply a search for visible stains.
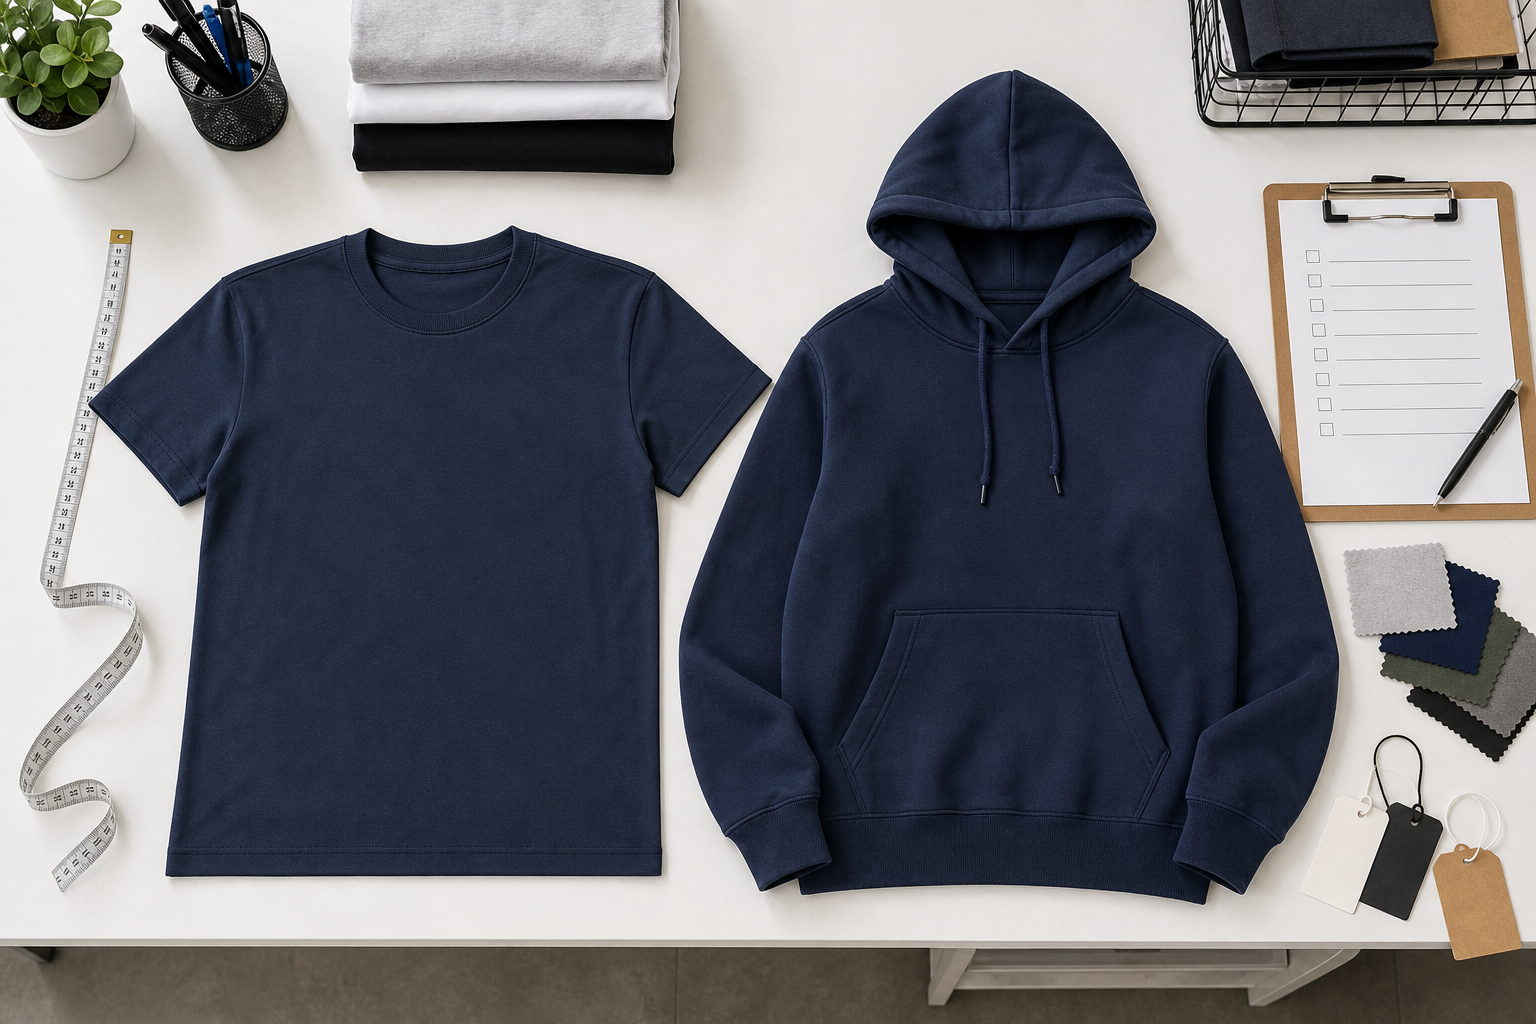
The inspector should compare the finished garments with the approved sample, Tech Pack, measurement chart, artwork, and packaging requirements.
A practical apparel QC checklist can include the following:
| Inspection Area | What to Check |
|---|---|
| Fabric | GSM, construction, holes, stains, shade |
| Measurements | POMs, size tolerance, symmetry |
| Sewing | Open seams, skipped stitches, broken stitches |
| Appearance | Shape, wrinkles, stains, workmanship |
| Printing | Position, size, adhesion, cracking |
| Embroidery | Stitching, thread tension, missing areas |
| Labels | Logo, size, care information, position |
| Trims | Zippers, cords, eyelets, buttons |
| Color | Shade consistency and approved color |
| Washing | Shrinkage, hand feel, wash effect |
| Packaging | Folding, polybag, barcode |
| Cartons | Quantity, carton marks and shipping information |
Not every product requires every inspection item. A basic T-shirt and a washed heavyweight hoodie will have different quality risks.
Critical, Major and Minor Defects
Defect classification needs to be agreed before inspection.
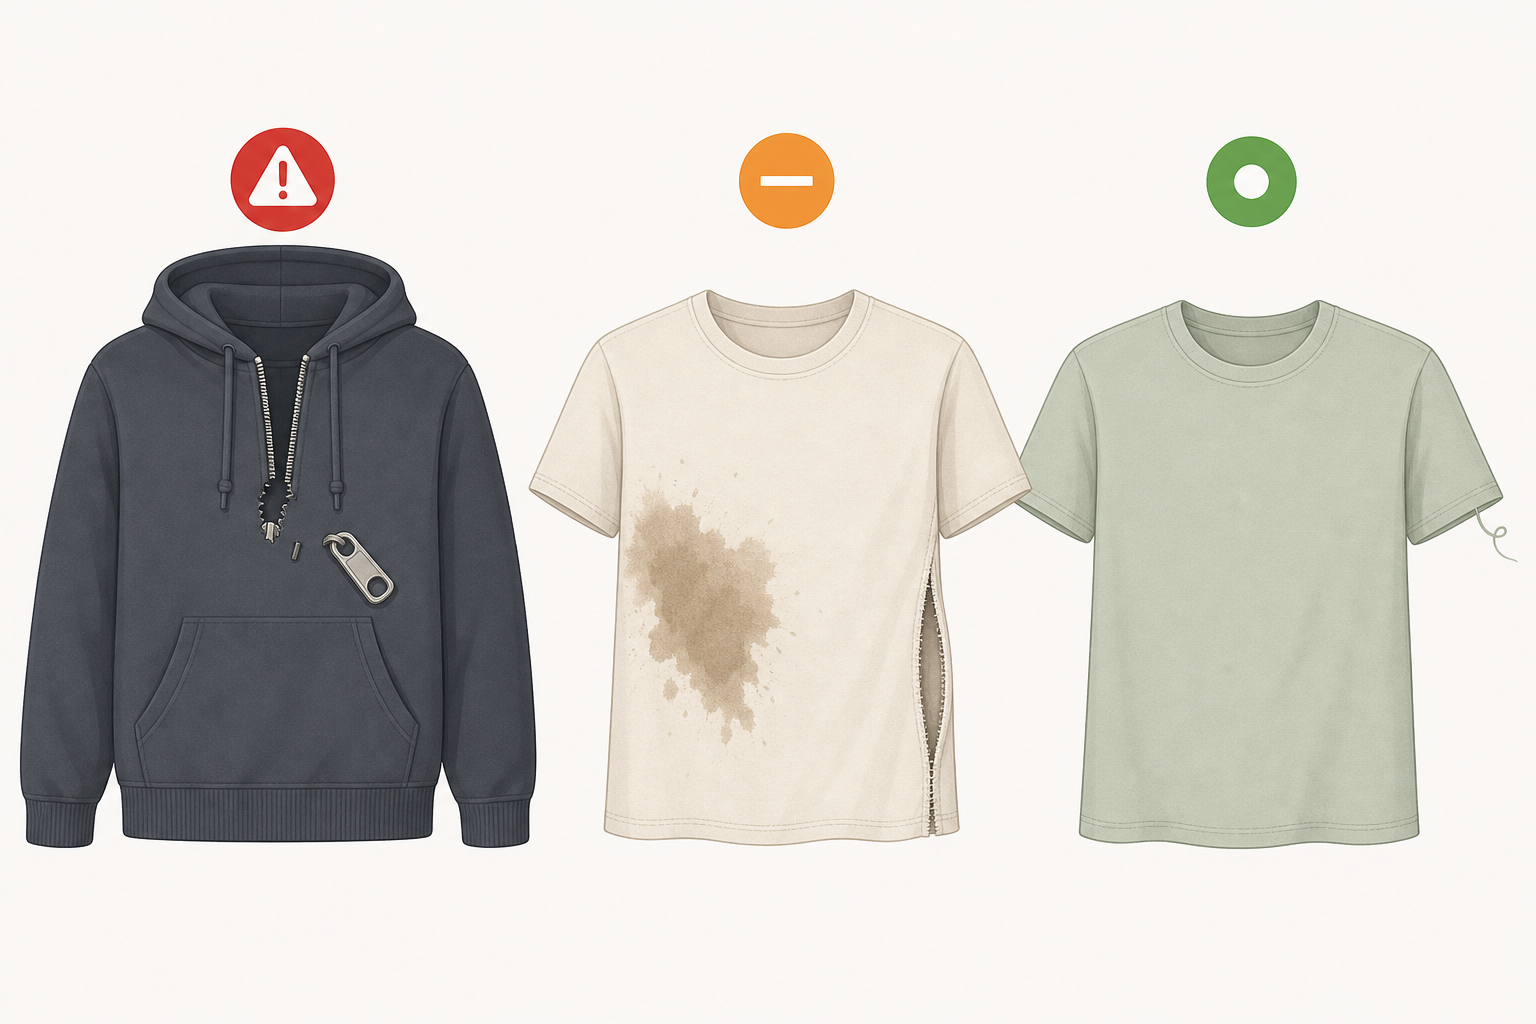
A common approach is to divide defects into critical, major, and minor categories.
Critical Defects
A critical defect can create a safety, regulatory, or serious product risk.
Examples may include a sharp metal component, a broken needle fragment, or another condition that could potentially injure the wearer.
Critical defects are normally treated much more strictly than ordinary appearance defects.
The exact acceptance requirement should be defined in the buyer’s inspection specification.
Major Defects
A major defect can affect the garment’s appearance, function, usability, or saleability.
Examples include:
- Open seam
- Broken or skipped stitching affecting construction
- Large visible stain
- Severe color difference
- Incorrect size label
- Major measurement deviation
- Peeling print
- Broken zipper
- Incorrect garment construction
A major defect does not necessarily make the garment dangerous, but it can make the product unacceptable for sale.
Minor Defects
A minor defect normally has a smaller effect on appearance or workmanship.
Examples can include:
- Loose thread
- Small stitching irregularity
- Slight print imperfection
- Minor label position deviation
A defect should not automatically be classified as minor just because it is small. The location and effect on the finished garment should also be considered.
Garment Measurement Inspection
Measurement problems are among the issues that can create serious disputes between a buyer and a factory.
A garment can look correct on a mannequin and still be outside the approved measurement tolerance.
That’s why the Tech Pack should define the Point of Measurement (POM) and tolerance before production.
For a T-shirt, common measurements include:
- Chest width
- Body length
- Shoulder width
- Sleeve length
- Bottom opening
- Neck opening
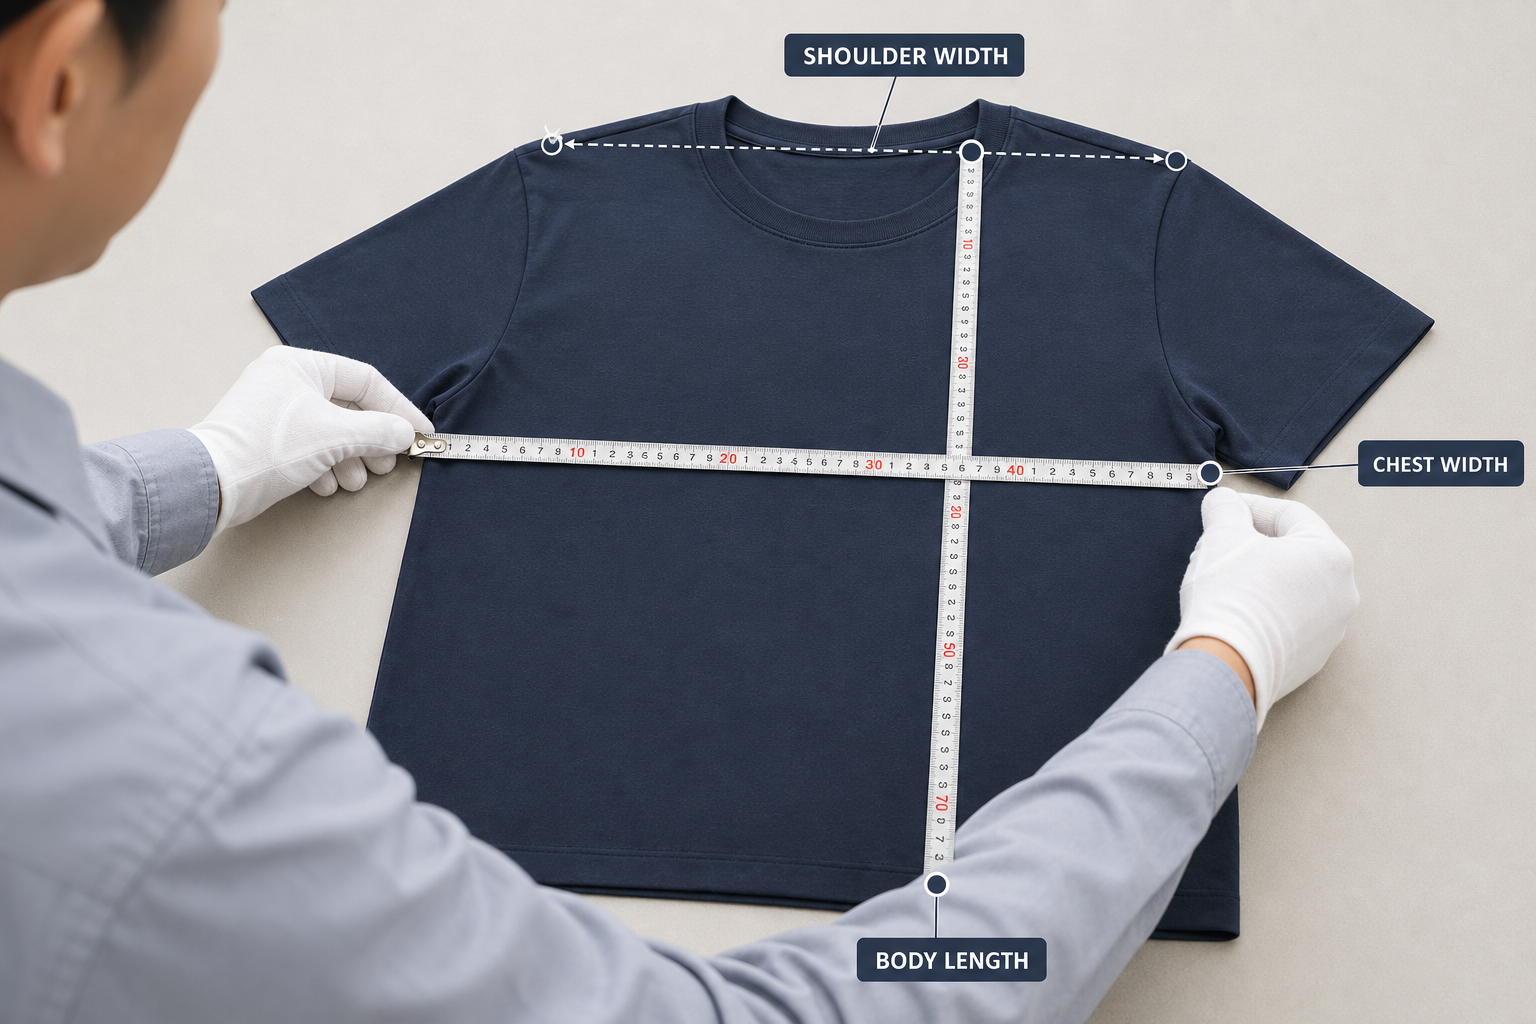
For a hoodie, the inspection may also include hood dimensions, pocket placement, cuff opening, and waistband measurements.
The measuring method needs to be clear.
For example, “body length” can be measured from different reference points depending on the garment construction. A measurement diagram in the Tech Pack removes much of that ambiguity.
The factory and buyer should agree on the tolerance before bulk production. Changing the tolerance during final inspection is a common source of disagreement.
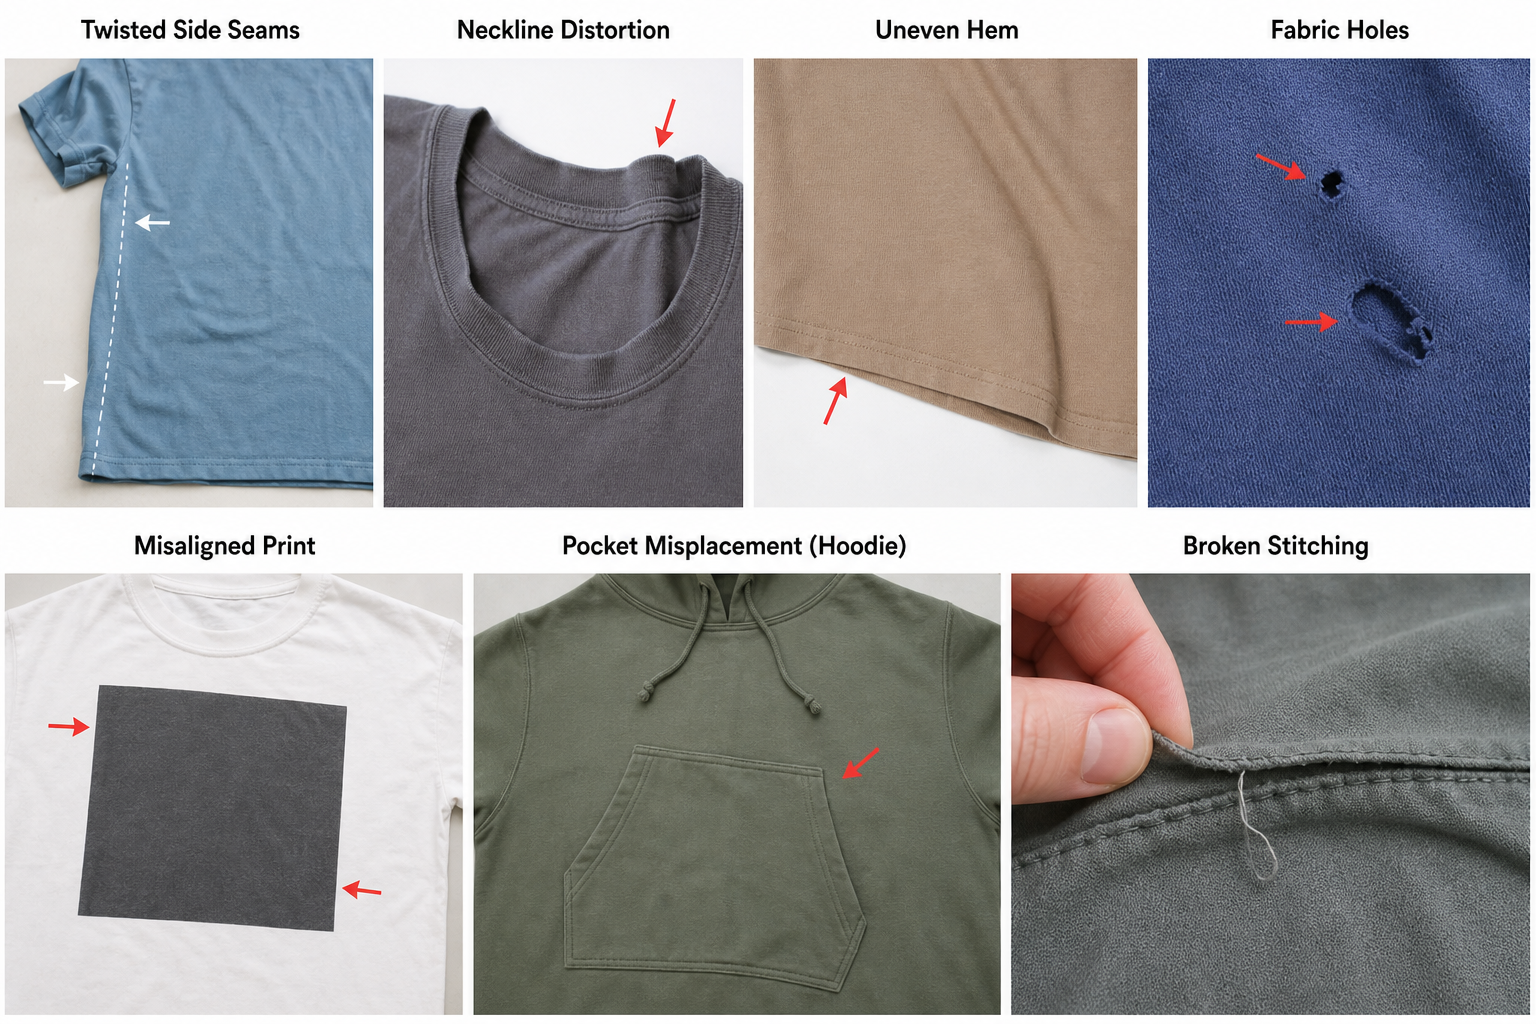
Common T-Shirt Defects
T-shirts have relatively simple construction, but that doesn’t mean there are few things to inspect.
During a final inspection, we normally pay attention to the overall shape and construction first.
Common problems include:
Neckline Distortion
The neckline may become stretched or uneven during sewing or finishing.
Twisted Side Seams
The side seam can rotate after washing, especially when fabric tension or construction is not properly controlled.
Uneven Hem
The bottom hem should be checked for width, stitching, and consistency around the garment.
Fabric Defects
Holes, yarn defects, stains, oil marks, or significant slubs should be recorded according to the agreed inspection standard.
Print Problems
The print may be incorrectly positioned, have poor adhesion, or show cracking after an unsuitable curing process.
Shade Variation
Different panels or garments may show noticeable color differences if fabric lots are not properly controlled.
Common Hoodie Defects
Heavyweight hoodies require more inspection points because the construction is more complicated.
For example, the hood should be checked for symmetry and correct attachment.
The kangaroo pocket needs to sit at the approved height and position.
Drawcords should match the approved length and construction. If metal eyelets or cord ends are used, their finish should also be checked.
Other common issues include:
- Uneven rib tension
- Incorrect sleeve length
- Pocket misalignment
- Hood shape inconsistency
- Broken stitching
- Print placement errors
- Fabric shade variation
- Excessive shrinkage after washing
For washed or vintage-style hoodies, color variation needs particular attention. Some degree of variation may be intentional, while excessive variation may indicate a production problem.
The approved sample should be the reference whenever possible.
Printing and Embroidery Inspection
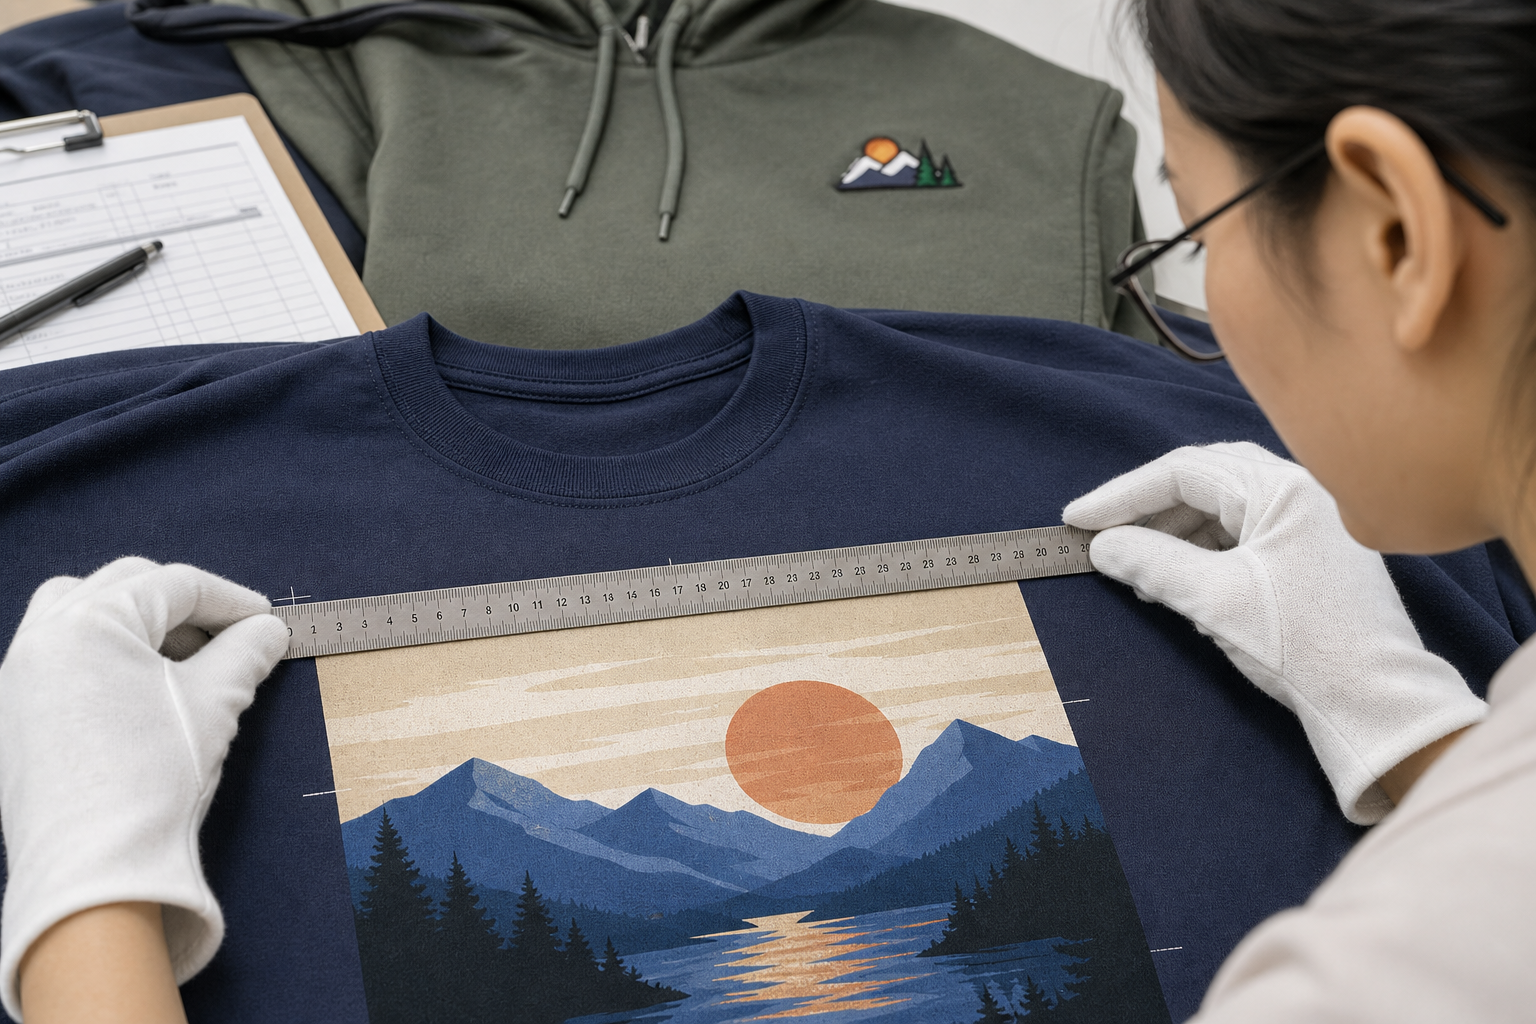
Print quality should be checked against the approved artwork rather than judged only by appearance.
The inspection can cover:
Position
Is the graphic located at the approved measurement from the neckline or other reference point?
Size
Does the finished print match the approved dimensions?
Color
Does it match the approved color reference or strike-off?
Surface
Are there cracks, pinholes, uneven coverage, or other visible problems?
Adhesion
Does the print remain firmly attached to the fabric?
For embroidery, inspect the logo shape, stitch coverage, thread tension, and loose threads.
If the garment has undergone washing, wash testing should be completed during development rather than relying only on visual inspection at the end of production.
Color Inspection
Color is one of the areas where buyers and factories can easily disagree.
Words such as “dark green,” “cream,” or “washed black” are not precise enough for production.
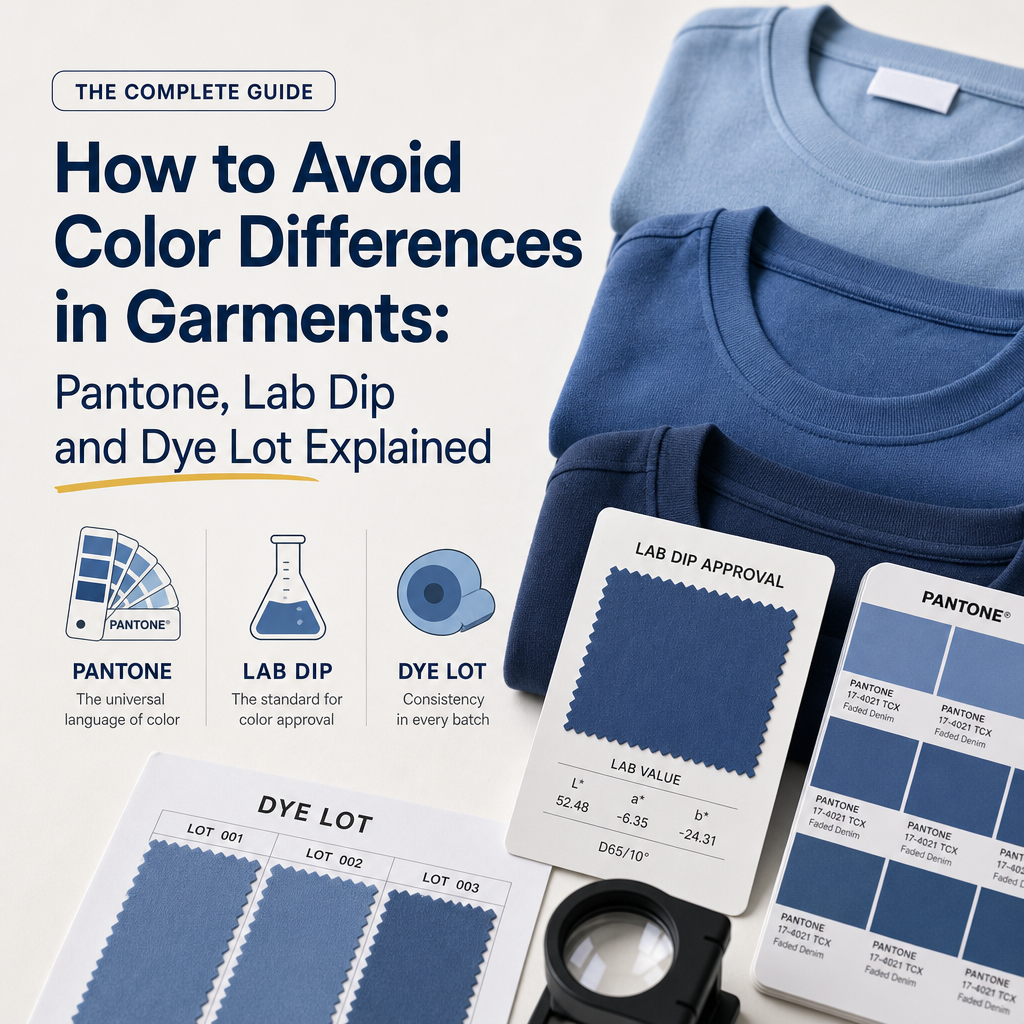
For bulk production, the factory may use an approved lab dip, Pantone reference, fabric swatch, or approved sample depending on the product.
The inspector should compare bulk production against the agreed standard.
For garments with several fabric panels, shade consistency should also be checked between components.
A small difference that is difficult to see under factory lighting may become obvious in daylight.
Labels and Trims
Labels are small, but an incorrect label can make an otherwise acceptable garment unsellable.
The inspection should confirm:
- Main label artwork
- Size label
- Care label
- Fiber composition
- Country of origin information where required
- Label position
- Label stitching
- Hangtag information
Trims should also match the approved specification.
For hoodies, this may include drawcords, eyelets, cord ends, zippers, snaps, and buttons.
If the brand has approved a specific metal finish, color, or logo treatment, the bulk production should be checked against that approval.
Packaging Inspection
Quality control doesn’t end when the garment is folded.
For wholesale and retail orders, packaging errors can create problems at the buyer’s warehouse.
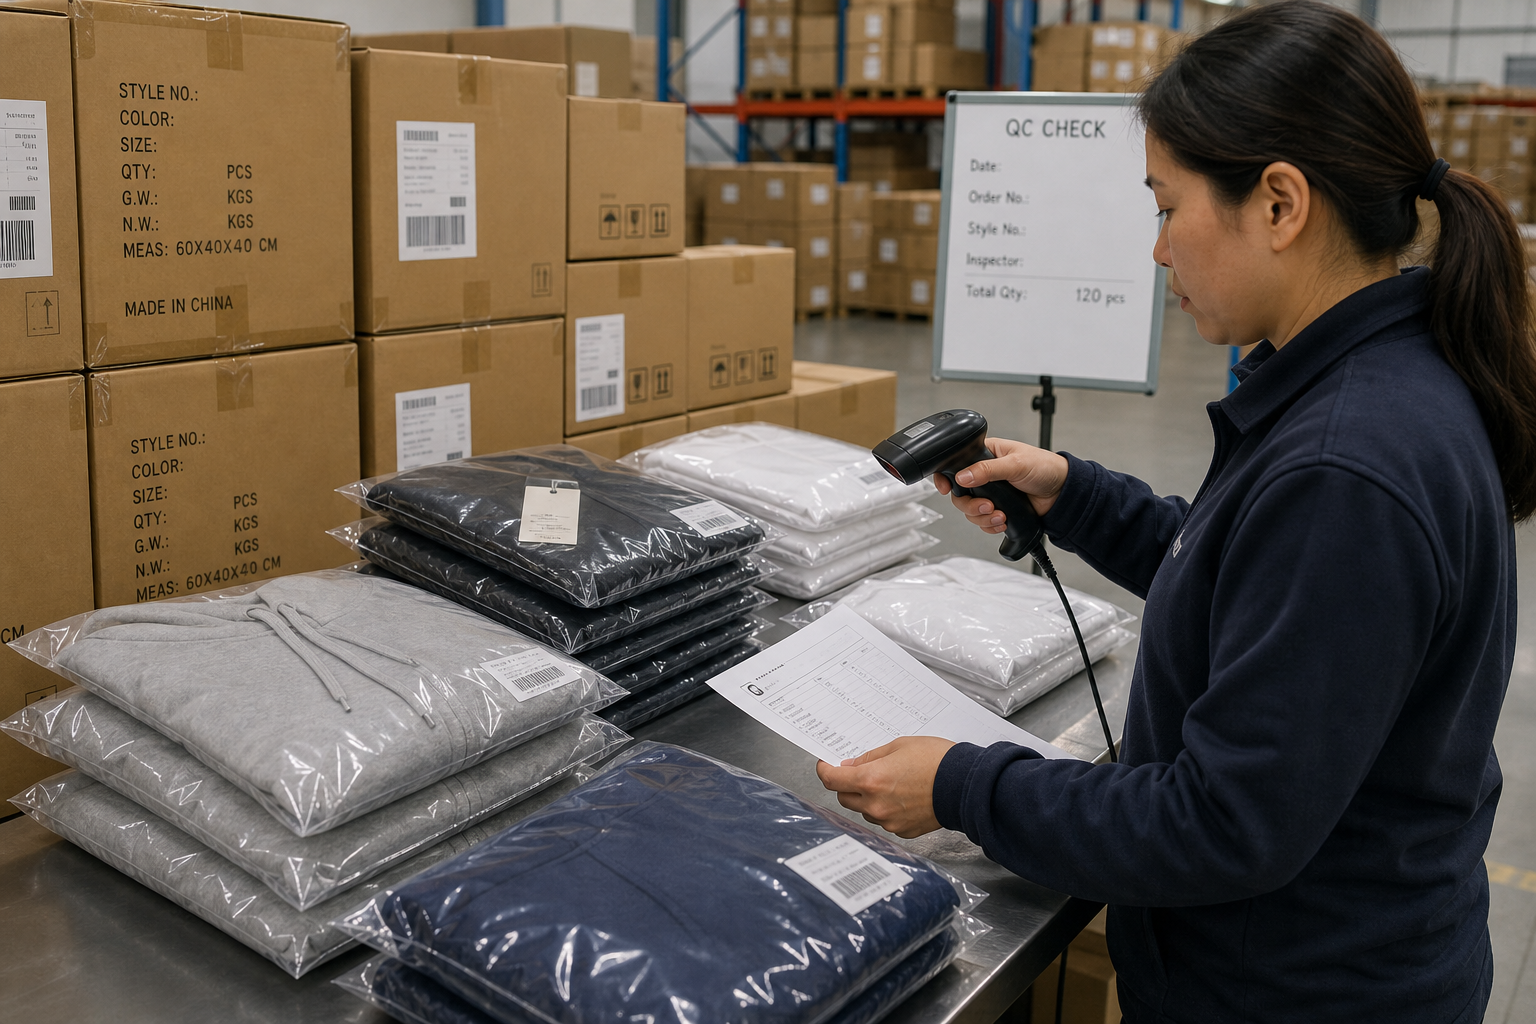
The final inspection should confirm:
- Correct garment folding
- Correct size in each polybag
- Correct SKU
- Barcode accuracy
- Hangtag placement
- Polybag warning requirements where applicable
- Carton quantity
- Carton markings
- Shipping marks
If a retailer has its own packaging requirements, those instructions should be included in the purchase order or Tech Pack.
Can a Shipment Pass AQL and Still Have Defects?
Yes.
This is one of the most important points for buyers to understand.
An AQL inspection is based on sampling. It does not mean every garment in the shipment has been inspected.
A shipment can pass an AQL inspection while still containing individual defective garments.
The purpose of the inspection is to determine whether the sampled production lot meets the agreed acceptance criteria.
For higher-risk products, buyers may need additional controls, such as inline inspections, testing, or tighter customer-specific standards.
AQL should be viewed as one part of a quality system rather than the entire quality system.
Factory QC vs. Third-Party Inspection
There are two common approaches.
Factory QC takes place during production and before shipment. The factory’s quality team can identify problems early and send information back to production quickly.
This is useful because a sewing issue found halfway through production can still be corrected.
Third-party inspection provides an independent inspection arranged by the buyer or another external party.
It can be useful when the buyer does not have its own staff at the production location.
The two approaches don’t have to compete with each other. A factory can maintain its own QC process while the buyer uses third-party inspection for independent verification.
When Should Garment QC Be Performed?
Quality control should not start only when the goods are packed.
For a typical apparel project, quality checks can happen at several stages.
Before Production
Confirm the approved sample, fabric, trims, artwork, measurement chart, and production requirements.
During Production
Check fabric, cutting, sewing, printing, and construction while production is still running.
Before Shipment
Carry out the final inspection after most or all garments are finished and packed.
This approach gives the factory an opportunity to correct problems before the entire order is completed.
For new products or complicated styles, early inspection is particularly useful.
A Practical QC Checklist for Apparel Buyers
Before approving a shipment, buyers can use this checklist:
Product
☐ Fabric matches approved specification
☐ Color matches approved standard
☐ Measurements are within agreed tolerance
☐ Garment construction is correct
☐ No serious stains or fabric defects
Sewing
☐ No open seams
☐ No significant skipped stitches
☐ Stitching is secure
☐ Hem is even
☐ Garment shape is consistent
Decoration
☐ Print position is correct
☐ Print size is correct
☐ Print color is approved
☐ No serious cracking or peeling
☐ Embroidery is clean and complete
Labels and Trims
☐ Main label is correct
☐ Size label is correct
☐ Care label information is approved
☐ Trims match the specification
☐ Drawcords and hardware are correct
Packaging
☐ Correct folding method
☐ Correct size and SKU
☐ Barcode is correct
☐ Hangtag is attached correctly
☐ Carton quantity is correct
☐ Carton markings are correct
How to Make AQL Inspection More Effective
AQL works much better when the inspection criteria are agreed before the goods are produced.
A buyer should not wait until the final inspection to explain what counts as a defect.
The Tech Pack should define measurements and tolerances. The approved sample should establish workmanship and appearance. Artwork should be approved before printing. Packaging requirements should be documented before packing begins.
The inspection company or factory QC team can then work against the same reference.
This is particularly important when buyers work with overseas manufacturers. Clear specifications reduce the amount of interpretation required on both sides.
Final Thoughts
AQL inspection gives apparel buyers a structured way to evaluate a production lot, but the inspection is only as useful as the standard behind it.
Before production starts, make sure the factory has the approved Tech Pack, sample, measurement tolerances, artwork, trim specifications, and packaging requirements.
During production, don’t wait for final inspection to discover every problem.
And when the final AQL inspection takes place, classify defects consistently and use the agreed sampling standard to make the acceptance decision.
For OEM apparel production, good QC starts long before the inspector opens the first carton. Clear specifications and communication between the buyer and factory are what make the final inspection meaningful.
At Vison Clothing, we work with apparel brands, wholesalers, and purchasing teams on OEM garment production. Our production process covers product development, sampling, manufacturing, and quality checks, with the buyer’s approved specifications used as the reference for production.
If you’re preparing a new T-shirt, hoodie, or other apparel order, having the QC requirements confirmed before bulk production can save considerably more time than trying to solve quality problems after the goods are finished.